Gmail is no stranger to all of us. Every student or office worker you meet will most likely sign up for a Gmail account, or better yet, already has one. It’s a free email service with a wide range of capabilities. So, how could you say no to that? However, there are many tips and tricks with Gmail that are not commonly known. In just less than 10 minutes, you can become a Gmail guru with these 16 handy Gmail hacks we will be sharing with you.
[/av_textblock]
[av_textblock size='15' font_color='' color='' av-medium-font-size='' av-small-font-size='' av-mini-font-size='' admin_preview_bg='']
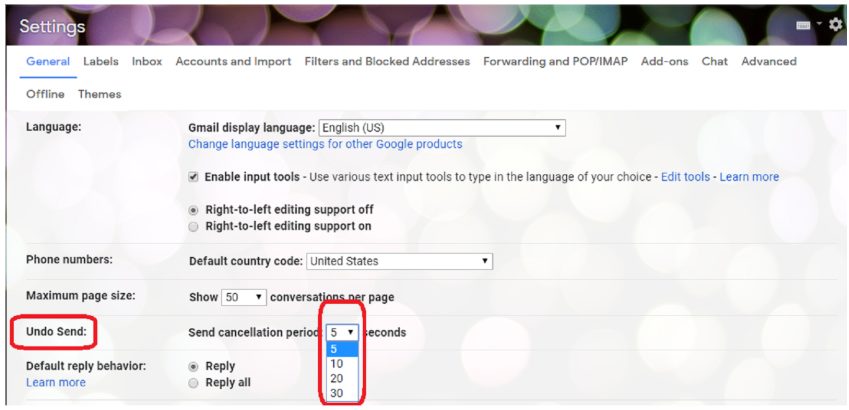
Email mistakes are extremely normal. However, it is unacceptable to mistakenly send an email with an unpleasant message or confidential attachment. This would inevitably create a bad impression, it reflects unprofessionalism and it could possibly have negative career consequences.
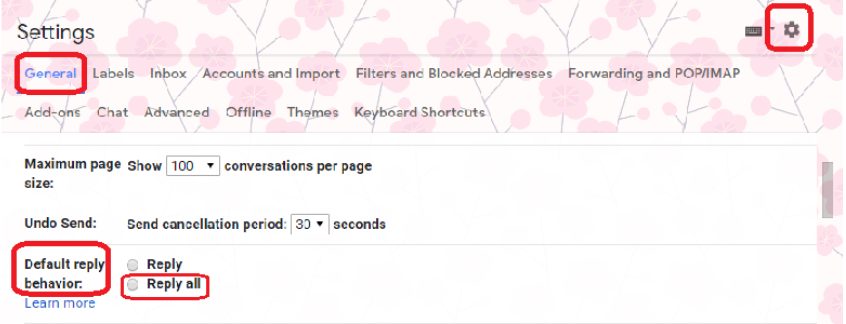
You can always prepare for situations like this by using Gmail’s “unsend” feature. Now you can retrieve the message in a span of up to 30 seconds. To do this, go to the General Settings page, and Enable the undo send and choose how long you want messages to pause before sending. This gives you the chance to cancel a message that you've accidentally sent before it's too late!
[/av_textblock]
[av_textblock size='15' font_color='' color='' av-medium-font-size='' av-small-font-size='' av-mini-font-size='' admin_preview_bg='']
There are certain emails that you simply want to disappear. Maybe it contains some private information that you don’t want anyone else to read except for the rightful recipients. Thankfully, Gmail created a self-destruct feature to accommodate such request.
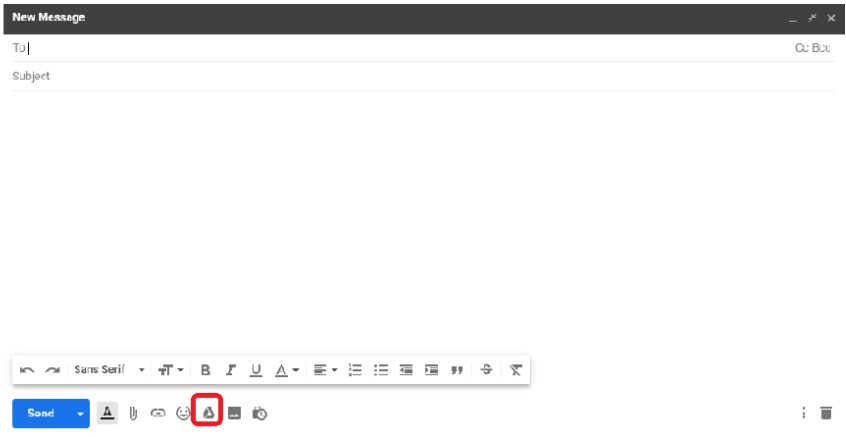
How? When composing an email, simply click on the lock icon that is nestled on the same line as the “Send” button. A new window pops out, labelled as Confidential Mode. Make the necessary changes in the Expiration Date box and you’re good to go. Make sure you do this before hitting that Send button though.
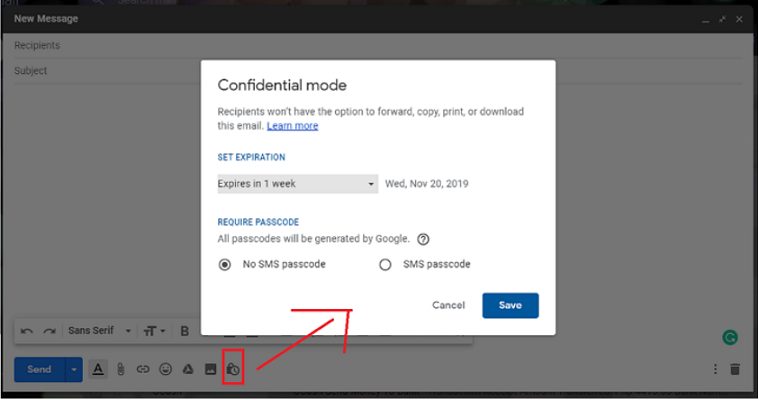
Using the same screenshot from the previous item, a passcode generator is available just below the expiry date box. If you want to add another layer of security to your email, then this passcode requirement works for you. Verification encryption is sent to the recipient via SMS. With this exclusive access, you can make sure only the ones who need to read your message are able to do so.
This is a sure way to boost your productivity! By using keyboard shortcuts, it would definitely save you a few seconds to up to a minute or more each day. Plus, if you accumulate all of that in one year, it makes a lot of difference.
As someone who checks emails everyday, I value every second that I can save from utilizing keyboard shortcuts. From composing emails and searching contacts, to selecting all conversations and removing them. I can do each one in just one press. To use the keyboard shortcuts, all you need to do is enable it from the General Settings.
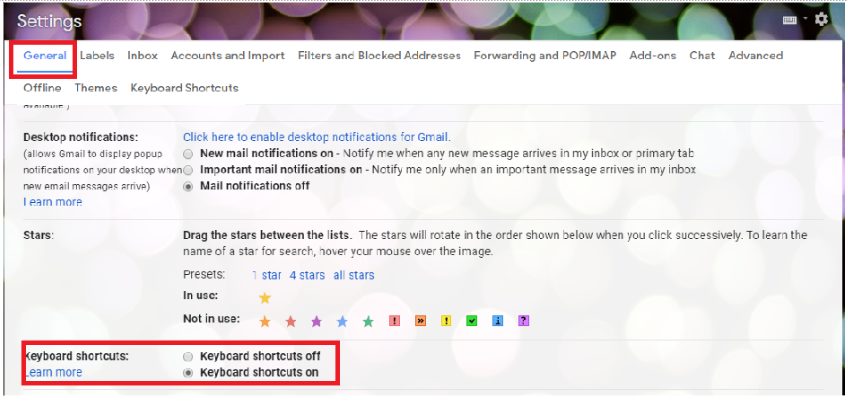
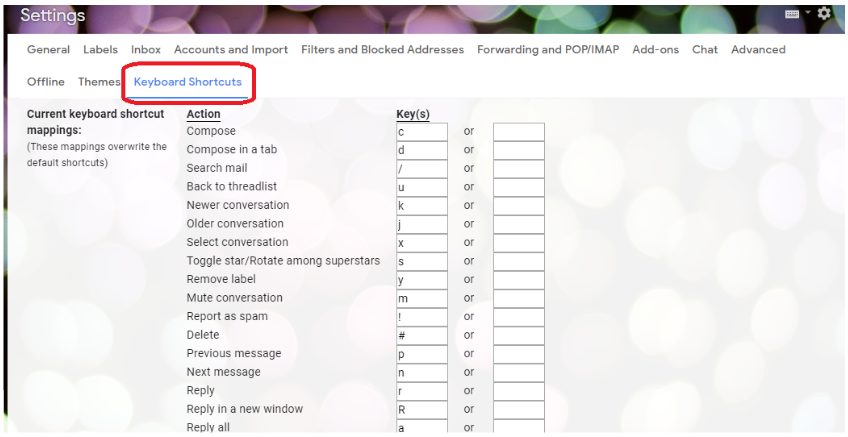
After Enabling it, you can go over the Keyboard Shortcuts list to know the default keys or you can create your own ones.
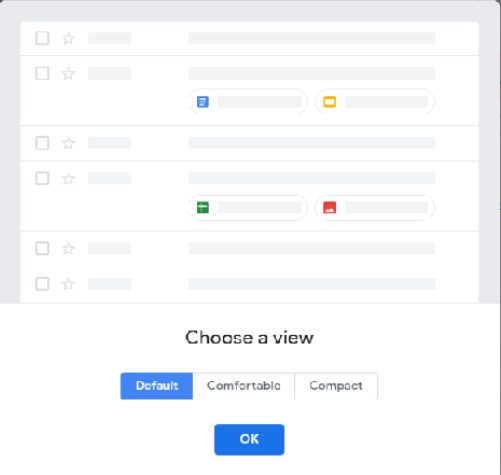
Do you want to change the density display of your email interface? If that’s a yes, Gmail predetermined that already. Under the Settings Gear’s drop-down list, click on the Display Density. You can select to up to three views -- Default, Comfortable and Compact.
The Default view is more detailed. You can see the file types of attachments. Whereas, Comfortable view deletes the mini details and just gives a classic look. Lastly, Compact view is a bit more dense looking type. The fonts are a little smaller. In that way, you can see more messages in one screen.
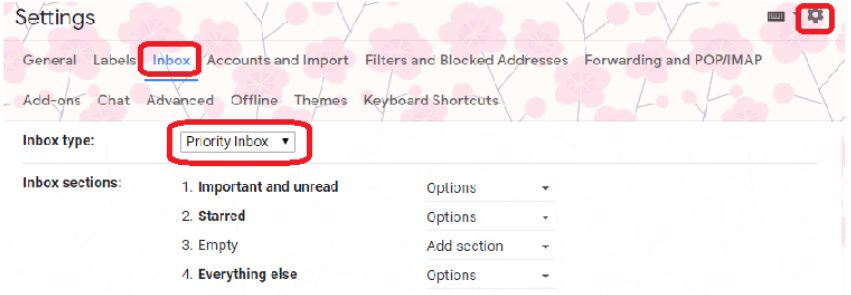
This is great for highly organized people. You have the ability to group your messages according to its level of importance. Likewise, saving you from scrolling up and down, looking for that one email sent by your boss earlier this year.
To achieve this setup, just click on the Settings Gear, then select Inbox tab. Look for the drop-down list under Inbox Type and pick Priority Inbox from one of the options. Now you can head on back to your Inbox and see how much more convenient it now looks.
Replying to multiple recipients should be an easy task. Yet, many still seem to miss this. As a result, it becomes a common pet peeve for some. However, Gmail has come up with an easy solution to this dilemma. Simply find the Default Reply Behavior in the General Settings Tab. Once you spotted it, select the Reply All option so you that it always show as the default option. This is extremely helpful if you commonly participate in group emails.
Is Google Drive your go-to for cloud storage? If so, there must be a lot of instances where you have to attach Google Drive Files into your emails. Sometimes, they can be too large to fit. The good news is Gmail leaves no sweat in doing that. Look for the Google Drive icon in the lowermost portion of the new message box and just pop it in.
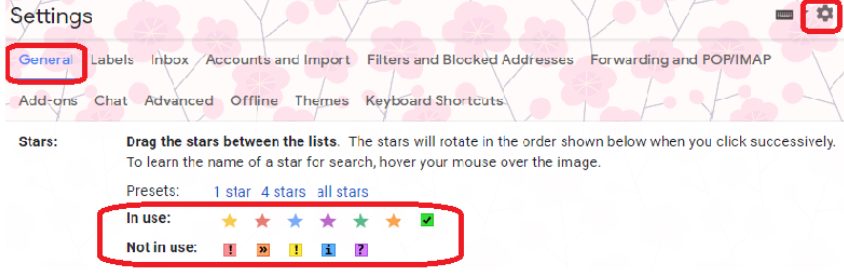
9. More Colors to Modify Starred Messages
Gmail offers beyond the standard “yellow” color for starred messages. Go check it out on the General Settings tab, scroll down and look for Stars Section. Other than color changing options, there are several icons that would put a distinctive look to your emails. This is a perfect hack for those who’d like to streamline message groupings.
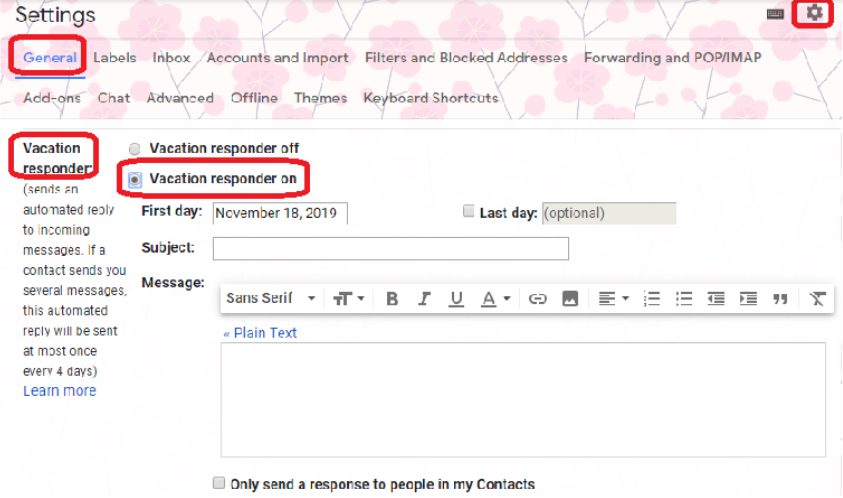
Vacation leaves are spent better with little or no business emails involved. If you want to have a total time out from all email exchanges, take advantage of Gmail’s auto responder. To turn it on, go to the Settings Gear, find the General tab then scroll down to the Vacation Responder section. Create your own auto-reply message by typing it in the box.
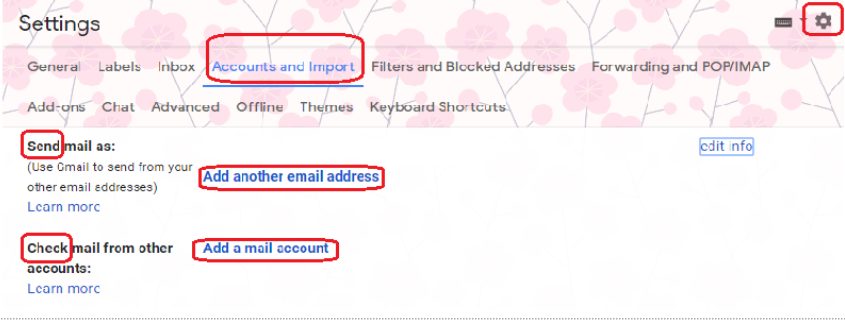
It’s highly likely that Gmail is not the only email account you’ve got. However, if you don’t want to waste your time checking up on them separately, you can merge it onto your Gmail account. Here’s how: Go to the General Setting, into the Accounts Tab then choose the action you want. You can send mail and check mails from other accounts using your Gmail Tab. Make sure to fill out the email credentials. An in-app service is offered (Gmailify) but it is not a mandatory thing.
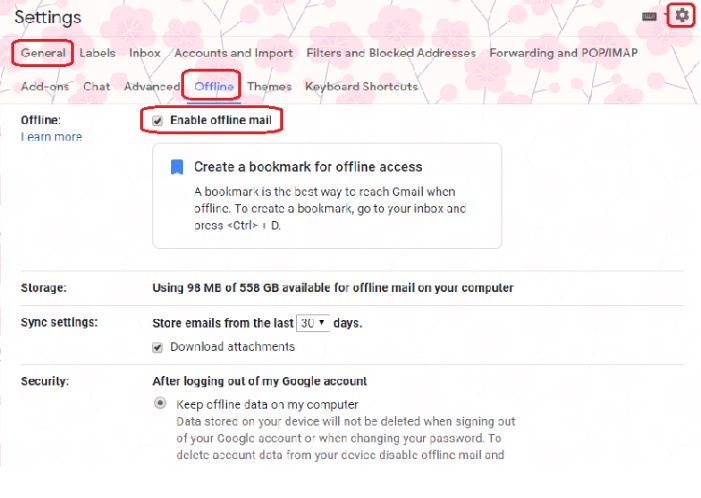
12. Use Gmail offline
[/av_textblock]
[av_textblock size='15' font_color='' color='' av-medium-font-size='' av-small-font-size='' av-mini-font-size='' admin_preview_bg='']
Do you want to keep that productivity momentum going in spite of the absence of internet access? Then enable Gmail Offline in the General Settings Tab. You’ll be capable of reading messages, drafting new messages and get them all ready once you are back online. You can store emails from the last 90 days at max. Besides that, you can still download attachments too.
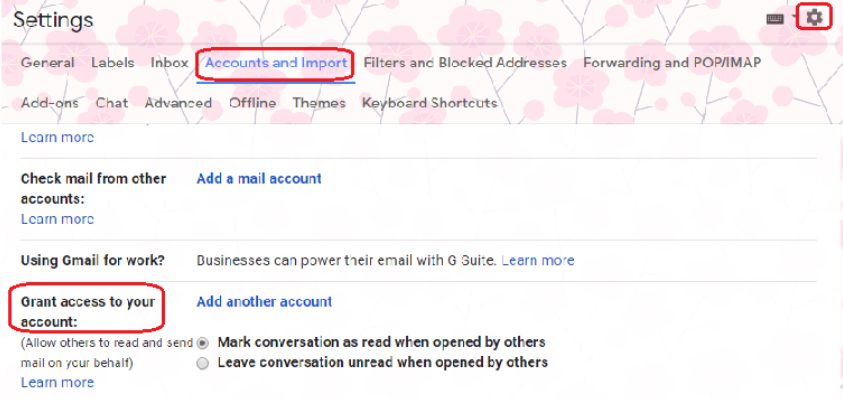
Do you have your own personal secretary to fill in your job in case of emergencies or leaves? If so, then you can give them a temporary access to your email without the need to change your password.
In this manner, you can delegate tasks like reading, sending or deleting messages for you. Chatting is prohibited so there’s no need to worry about that. Configuration includes going to the General Settings tab, then find the Accounts and Import tab. From there, scroll down and seek for the Grant Access To Your Account section to do the necessary changes.
Level up more your Gmail skills! Perform this long list of search shortcuts. Save yourself from scrolling up and down for long.
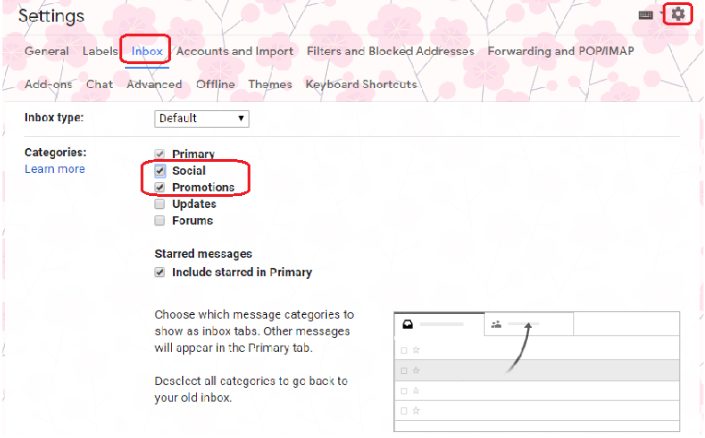
If you find yourself getting frustrated over multiple tabs, then this Gmail hack works wonders. Regardless of the categories, the primary inbox is the only inbox tab you’ll see. All emails flowing into your emails are crammed up in one place, for a good reason.
All you have to do is go to General Settings page and click on the Inbox tab. Uncheck the Promotional and Social Inbox Tabs so you can start using this hack. You can only do this if your Inbox is on Default.
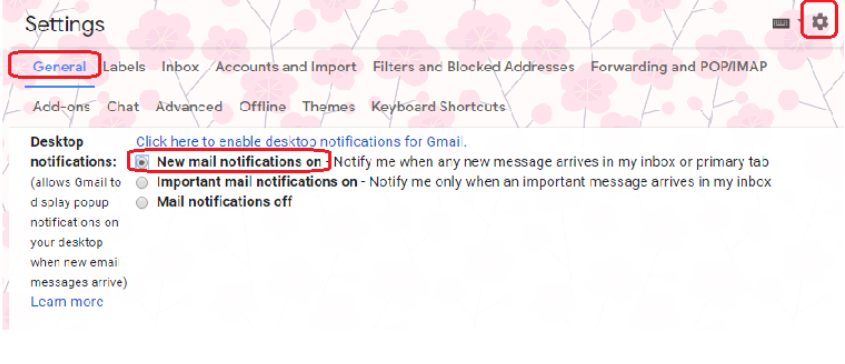
Well it’s pretty obvious that emails are not our only priority. Our plate is usually full. So if you need to leave your email window to use other apps, you can turn on your Desktop notifications. This will lower the chances of missing out urgent mails.To do this, just turn on your desktop notifications on the General Settings Tab.
So there you have it! 16 Gmail tips and tricks to boost your productivity.
If you want to really ace your emailing experience, applying these Gmail hacks is a good place to start.
Don't miss out any HighMark SEO Digital article. Bookmark our page now!